


This is an easy way to make a infrared sensor button with the Arduino.
This example shows a infrared sensor button with an integrated light. If you touch the surface then the button lights red. Touch the surface again, then the light turns off.
The first image is a design example.
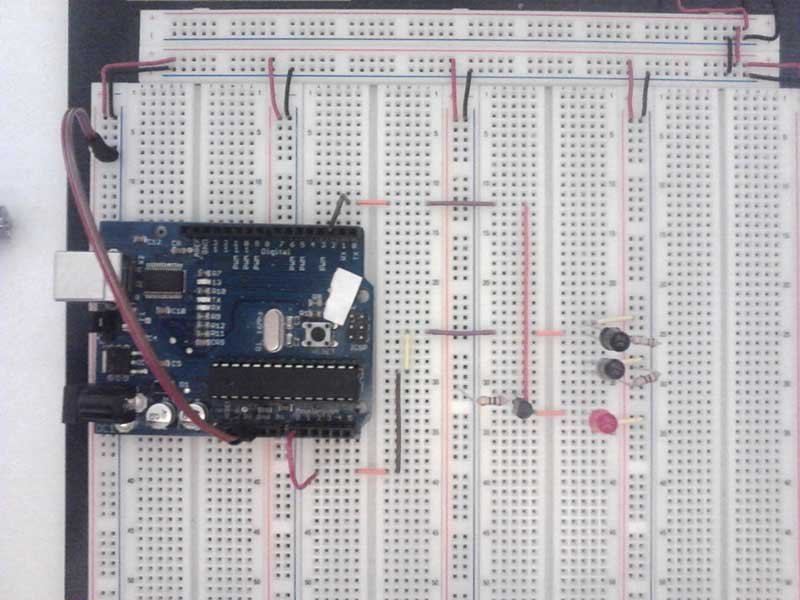
Step 1: Circuit
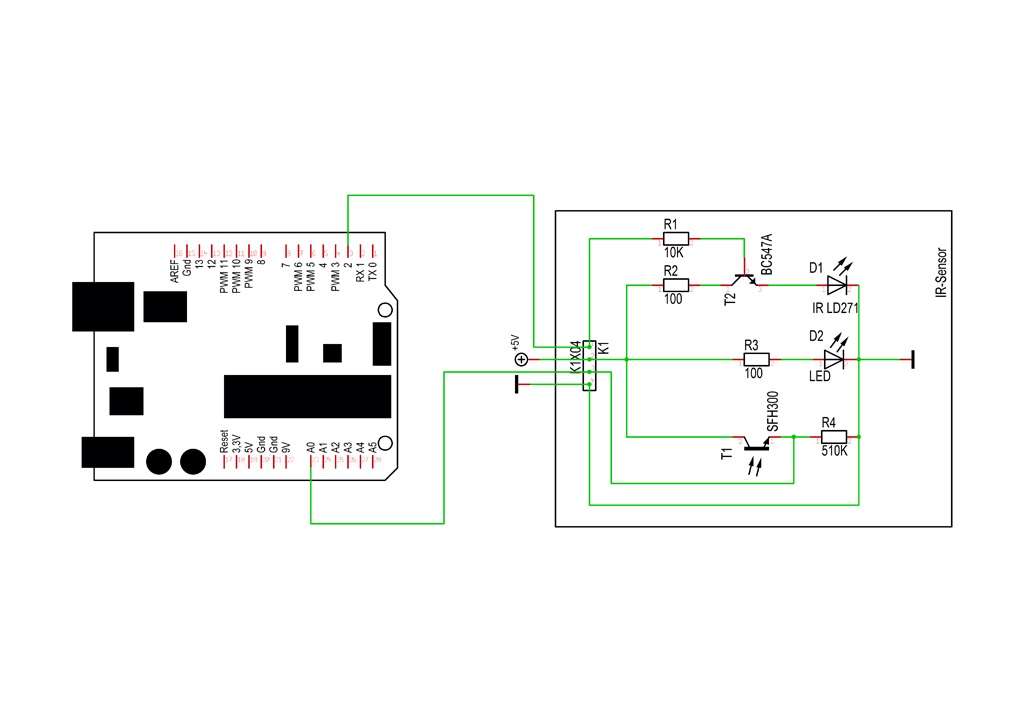
To change the intensity of the Phototransistor (T1) use an another resistor for R4.
Step 2: Parts list
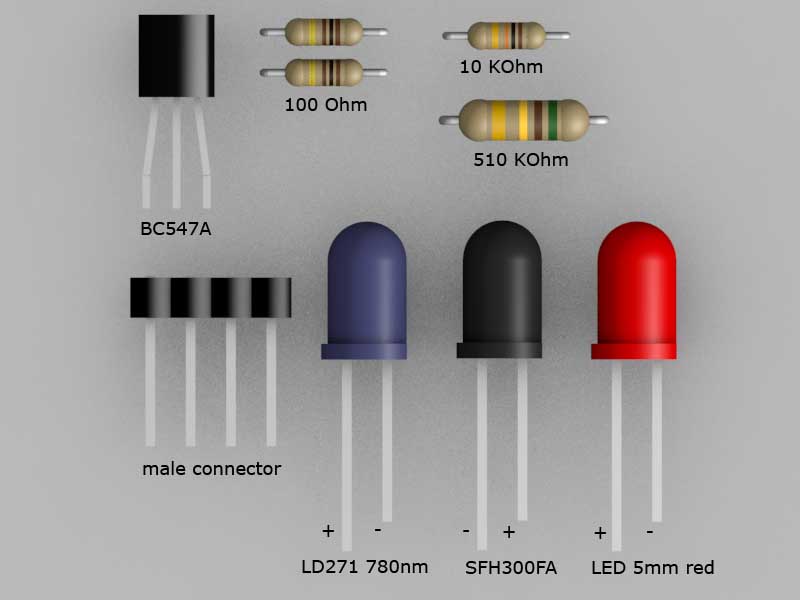
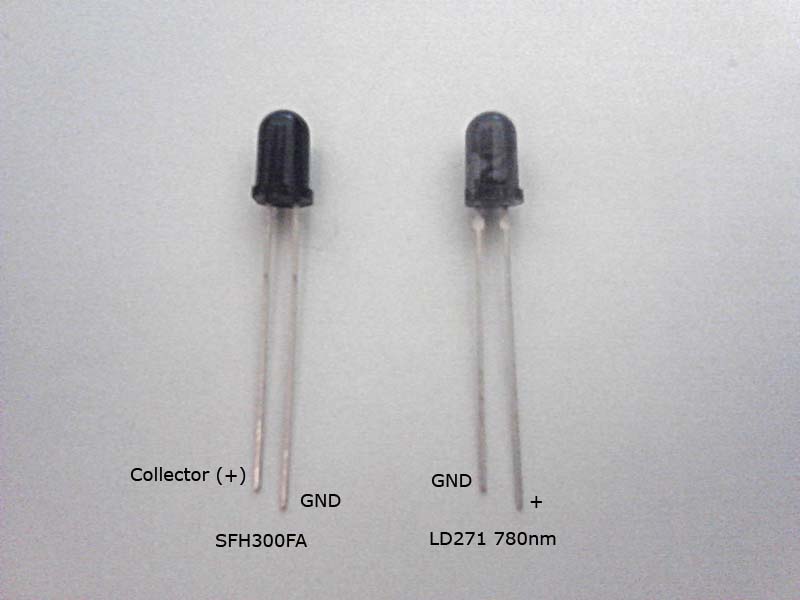
D1 IR LD271
D2 LED 500 red
K1 male connector 4pins
R1 10KOhm
R2,R3 100 Ohm
R4 510KOhm
T1 SFH300FA
T2 BC547A
Step 3: Arduino sketch

The Arduino Code is very simple:
#define ACTIVATE_VALUE 750 // Change this value for an another distance
#define PRESS_THRESHOLD 250
int SENSOR_VALUE;
byte ON_OFF = 0;
void setup() {
Serial.begin(9600);
pinMode(2, OUTPUT);
pinMode(A0, INPUT);
}
void loop() {
SENSOR_VALUE = analogRead(A0);
Serial.println(SENSOR_VALUE);
if (SENSOR_VALUE > ACTIVATE_VALUE) {
digitalWrite(2, ON_OFF = !ON_OFF);
delay(PRESS_THRESHOLD);
}
delay(100);
}
Step 4: Example

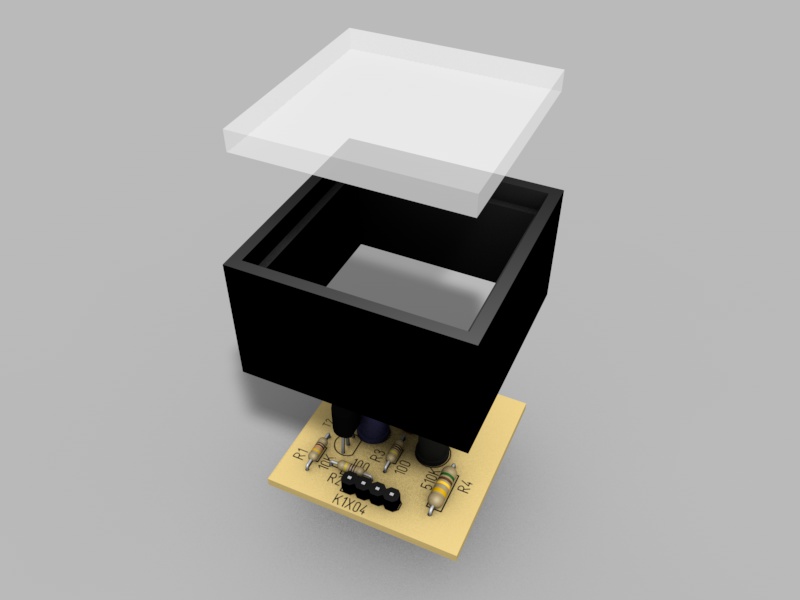
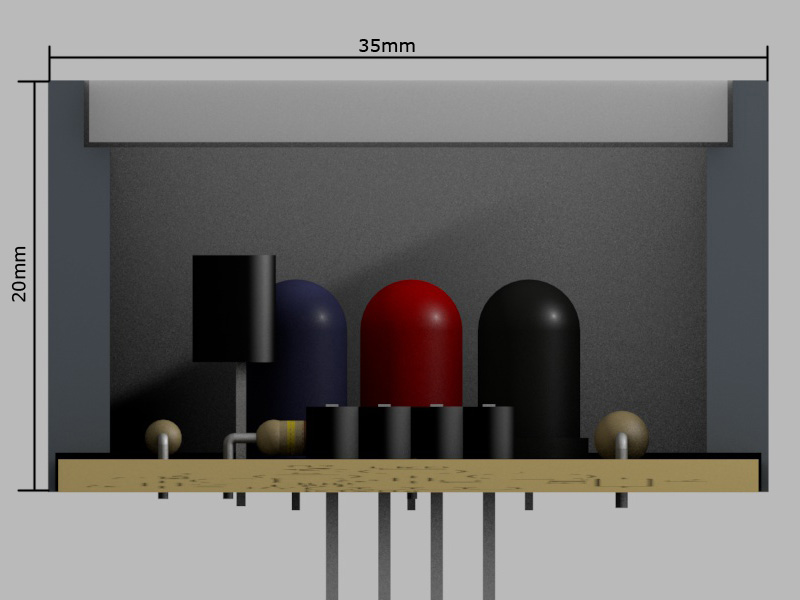


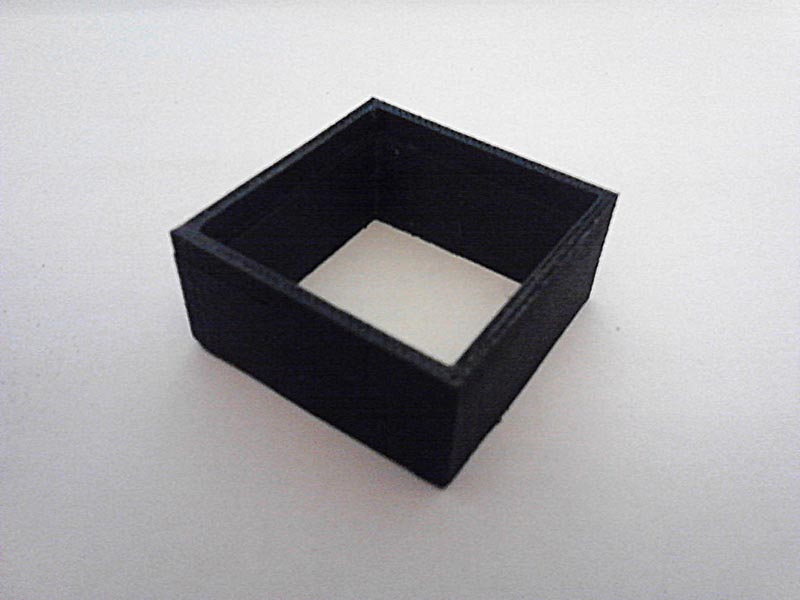


The case I have printed out on a 3D-Printer. The top plate is an 31x31x3mm Acryl-Glas. My button is 35x35x20mm big. The distance from the IR-Diod to the acrylplate is ~6mm.
With a sheet of sandpaper I have made the surface of the acrylglas diffuse.